NZ502E Software Update Instructions (for APP, MCU and Bluetooth)
NZ502E Improvements (3/1/2017)
• Fixed that tuner frequency disappears in sub LCD.
Estimated Update Time: 12 minutes
Introduction
Please confirm the software version of your unit prior to performing the update. Refer to step “3. Confirm Result” at the end of this document.
If the software version on your device matches the versions as below, you do not need to perform the software update.
You also do not need to perform the software update if the serial number of your unit is bigger than 11161 or 1000001.
The serial number after 11161
The serial number after 1000001
Please download and print this NZ502E Software Update Instructions procedure prior to downloading and installing this software update.
It is important that this procedure is done in the order described in this document as failure to do so may result in the NZ502E becoming inoperable.
Warning: Do not perform this software update while operating the vehicle. Do not interrupt the power of the NZ502E while the update is in progress. Remember to record all the “Settings” prior to performing the update process, as the unit will return to factory default settings after the update.
1.Preparation
1-1. You will need a blank MicroSD Card which has a capacity of more than 128MByte.
(You cannot use the 8G Micro SD card which came with the NZ502E. If you do, it will void your warranty and you will need to purchase a replacement card.)
1-2. Please download the "NZ502E.zip" file from download page and save to your computer.
Download "NZ502E.zip" file (About 38MByte)
1-3. After the download is completed, you will need to unzip the "NZ502E.zip" file using WinZip (http://www.winzip.com/downwz.htm).
A folder named "SW_Update" will be created. Then copy the "SW_Update" File to the blank MicroSD Card.
2.Update
2-1. Please press the "MENU ■PWR" button which is located at the lower center of the front escutcheon until NZ502E shuts down.
2-2. With the NZ502E powered off, please take out the Navigation microSD Card which is currently in the MicroSD Card Slot.
Note:The Navigation Map data is contained in the microSD Card. Please be careful and do not lose or misplace this micro SD Card.
Then insert the MicroSD Card which has the "SW_Update" into the MicroSD Card Slot.
2-3. With the MicroSD Card which contains the "SW_Update" file inserted into the NZ502E, please push the "MENU ■PWR" button.
2-4. Please press the "OPEN" button after the unit turn on.
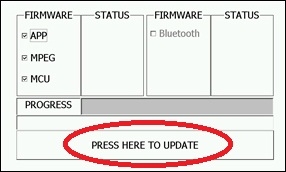
2-5. The NZ502E will walk you through the update process now. Please touch the "PRESS HERE TO UPDATE" option.
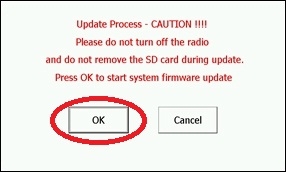
2-6. Please touch the "OK" option.
2-7. When you see the update status bar showing the "APP" update progress, please do not unplug, disconnect or power off the NZ502E until the update has been completed.
This portion of the update will take about one minute to complete.
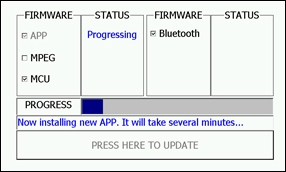
2-8. "Bluetooth", "MPEG" and "MCU" will also update automatically and sequentially. Please do not unplug, disconnect or power off NZ502E until the update has been completed. This portion of the update will take about 11 minutes to complete.
2-9. If the software update completed, NZ502E close the display panel automatically. Please press the "MENU ■PWR" button until NZ502E shuts down."
2-10. With the NZ502E powered off, please take out the MicroSD Card which contains the "SW_Update" file.
2-11. Please re-insert the Navigation MicroSD Card which was taken out in Step2-2.
2-12. Please restart NZ502E by pushing the "MENU ■PWR" button.
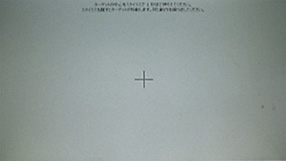
2-13. When you press the "OPEN" button, the screen will ask you to adjust the Touch Screen Calibration.
Please follow the instructions on the screen to properly calibrate the touch screen by touching the crosshairs (+) with your finger tip or by using a touch screen stylus pen.
2-14. After you have completed the touch screen calibration steps, touch the screen in any location to exit the touch screen calibration.
3.Confirm result
3-1. With the NZ502E powered on, please press the "MENU ■PWR" button.
3-2. Please touch the "Setting" button (Touch panel button at the bottom of the right side of the screen).
3-3. Please scroll to the end of General item.
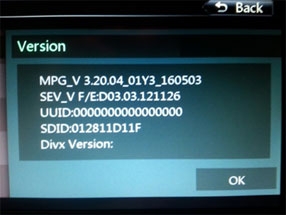
3-4. Please touch the "Version" button (Touch panel button).
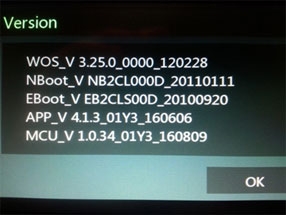
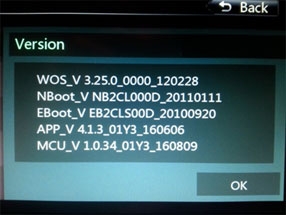
3-5. Please confirm to see the following version for "APP" and "MCU" software.
APP_V 4.1.3_01Y3_160606
MCU_V 1.0.34_01Y3_160809

3-6. Please press the "MENU ■PWR" button.
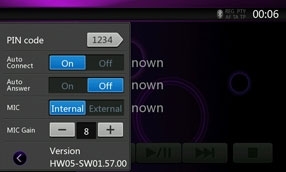
3-7. Please touch the "Bluetooth Audio" icon.
3-8. Please touch the ">" button which is located at the bottom of left side of the screen.
3-9. Please confirm to see the following version for "Bluetooth" software. The letter begins the scroll when touch the letter of "HW05-SW01.57".
HW05-SW01.57.00